Monday, July 25, 2016
post query in node js
http://stackoverflow.com/questions/5710358/how-to-retrieve-post-query-parameters-in-express
Friday, July 22, 2016
Angular JS Input box
https://docs.angularjs.org/api/ng/input/input%5Btext%5D
https://plnkr.co/edit/?p=preview
Thursday, July 21, 2016
mongoose CRUD
http://scottksmith.com/blog/2014/05/05/beer-locker-building-a-restful-api-with-node-crud/
https://docs.mongodb.com/manual/reference/method/db.collection.save/
Tuesday, July 19, 2016
Send text message
http://www.codeproject.com/Articles/15299/Send-a-Text-Message-to-a-Cell-Phone-from-a-VB-NET
Monday, July 18, 2016
Sunday, July 17, 2016
send push notification
https://azure.microsoft.com/en-us/documentation/articles/notification-hubs-android-push-notification-google-gcm-get-started/
Friday, July 15, 2016
Thursday, July 14, 2016
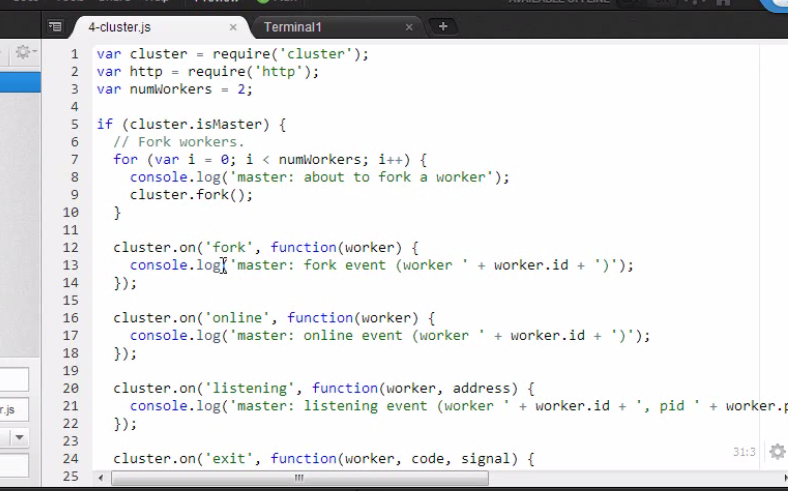

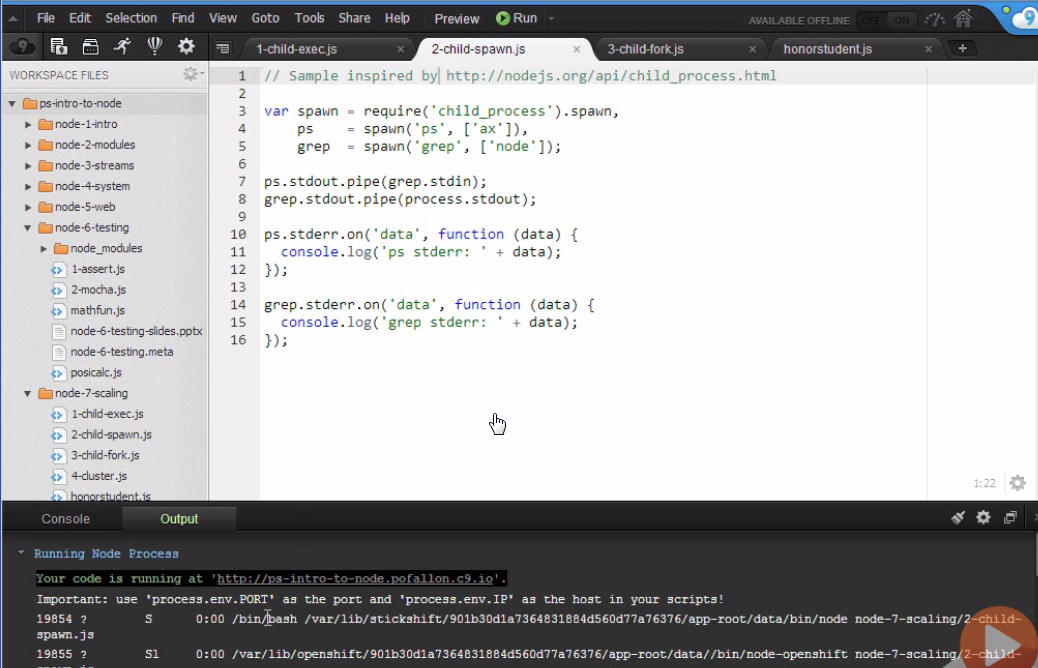
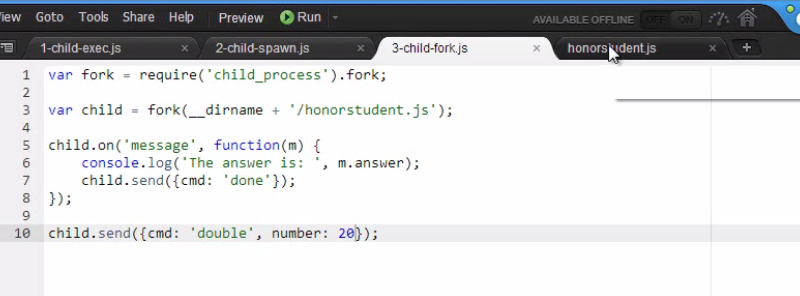


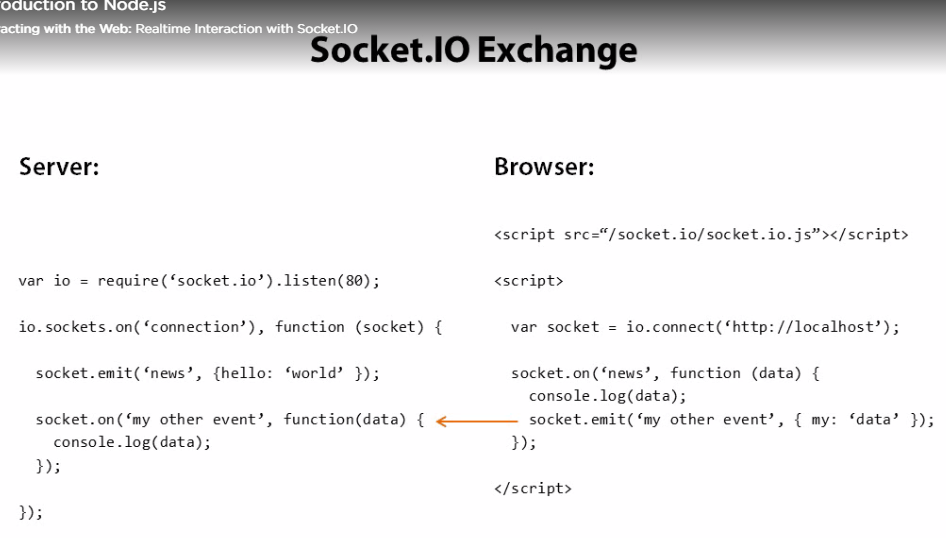
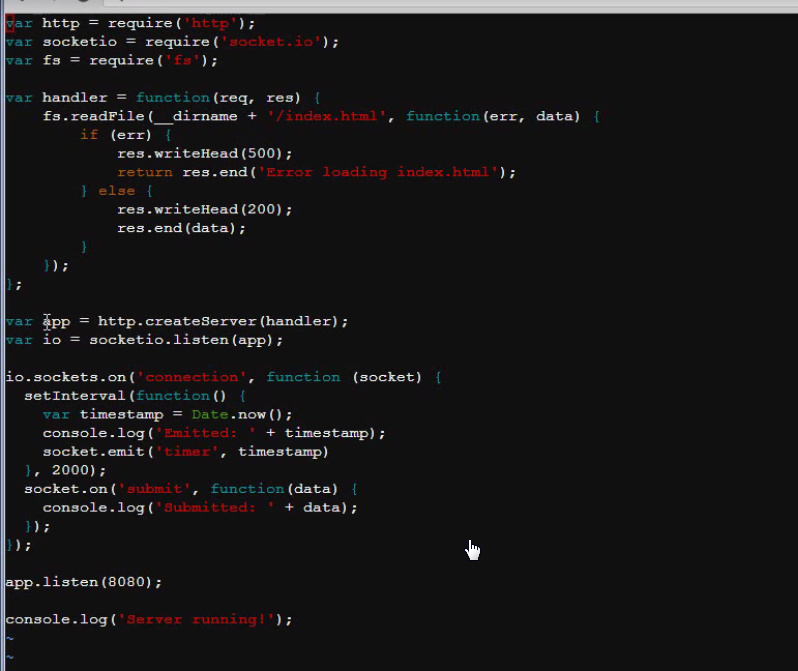
web sock socket id
https://app.pluralsight.com/player?course=node-intro&author=paul-ofallon&name=node-intro-m5-web&clip=5
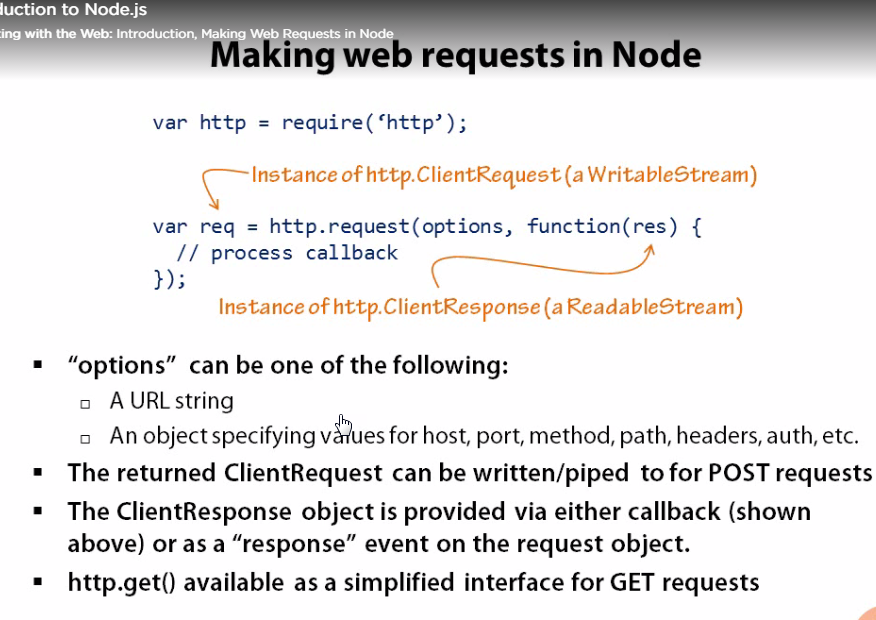
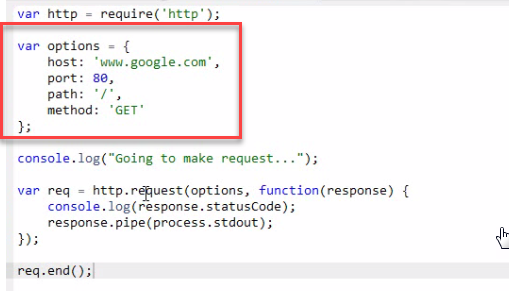
Node js http
https://app.pluralsight.com/player?course=node-intro&author=paul-ofallon&name=node-intro-m5-web&clip=0


GET no redirect

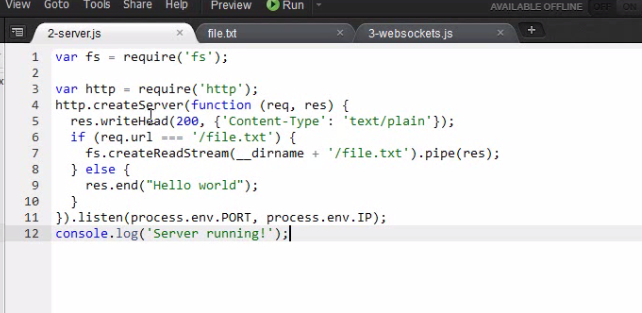
_dirname
directory the server is running
GET no redirect
_dirname
directory the server is running

POSIX node js
https://app.pluralsight.com/player?course=node-intro&author=paul-ofallon&name=node-intro-m4-system&clip=2
sync

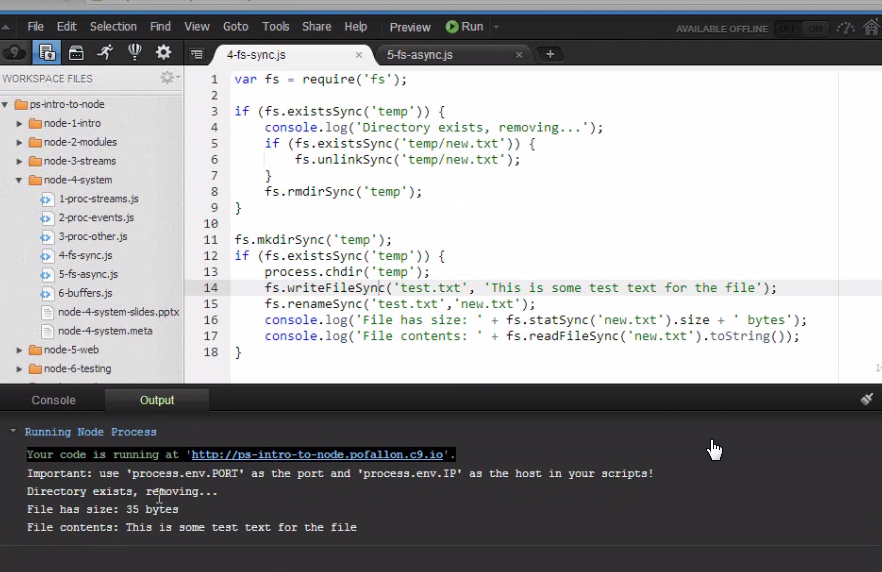
Async

sync
Async
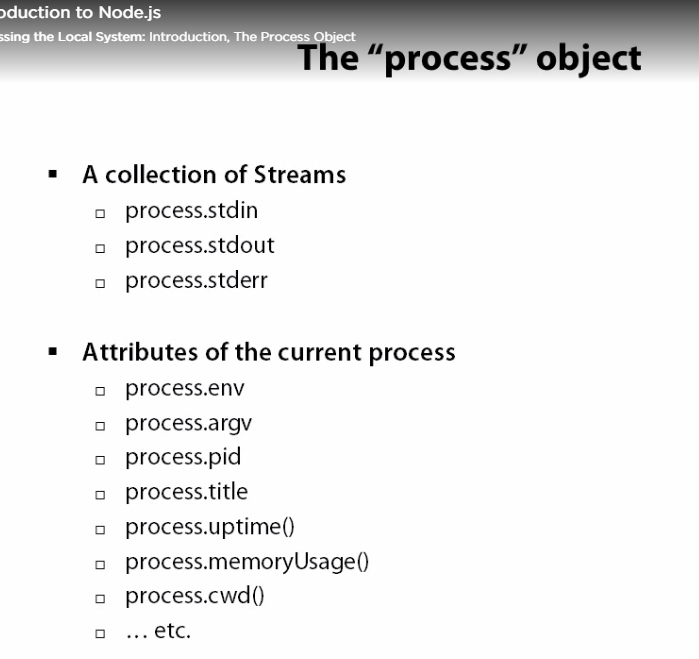
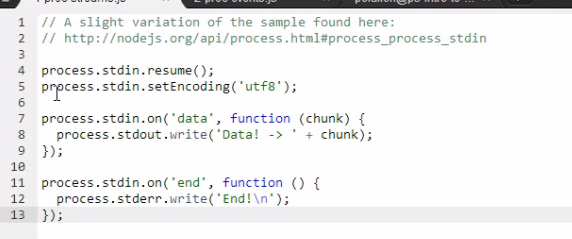
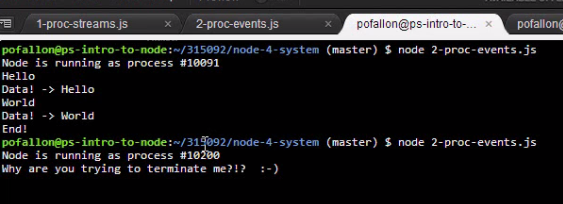
Node js Process object
https://app.pluralsight.com/player?course=node-intro&author=paul-ofallon&name=node-intro-m4-system&clip=0
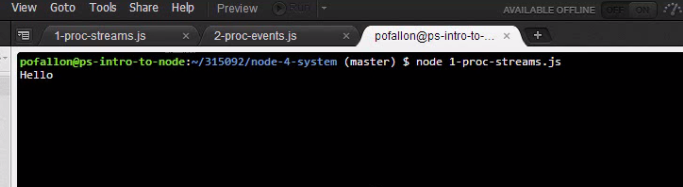


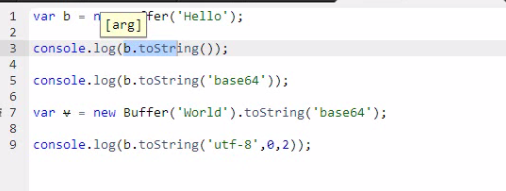
Node js streams
https://app.pluralsight.com/player?course=node-intro&author=paul-ofallon&name=node-intro-m3-streams&clip=6

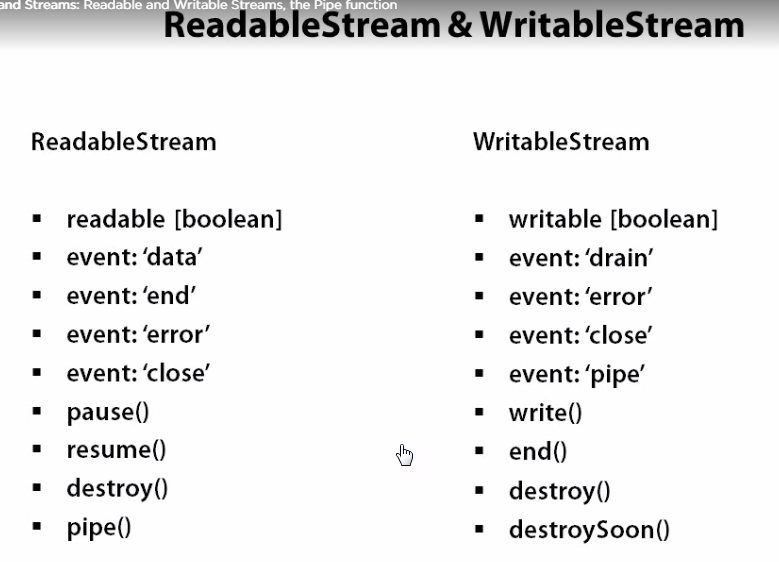
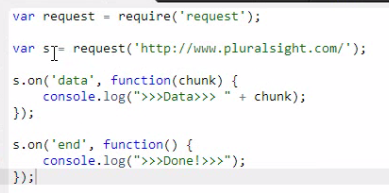
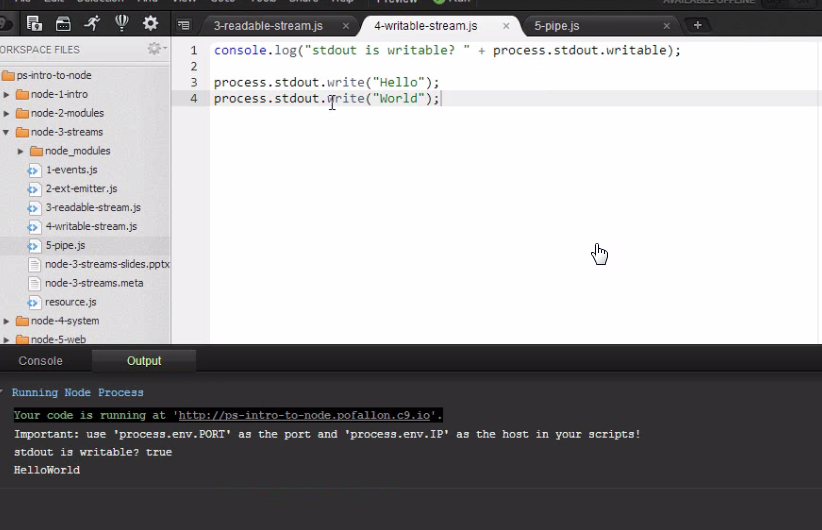
pipe
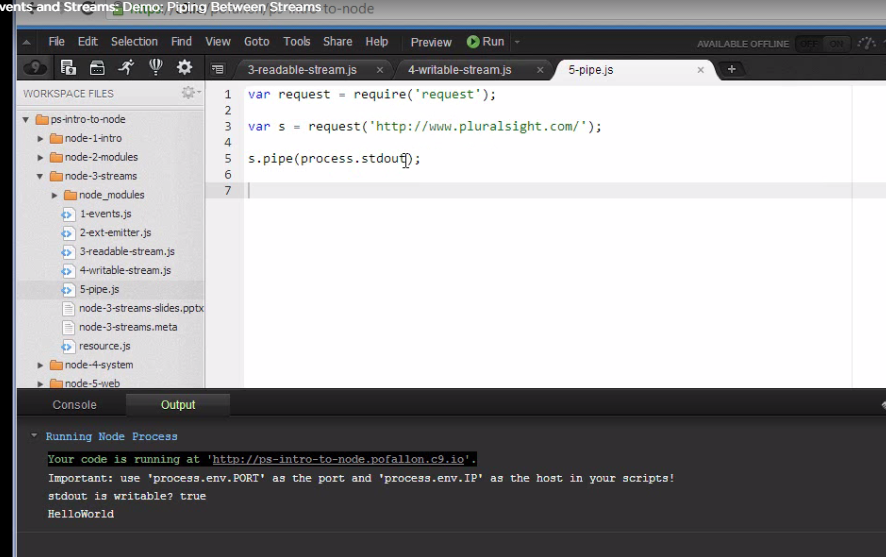
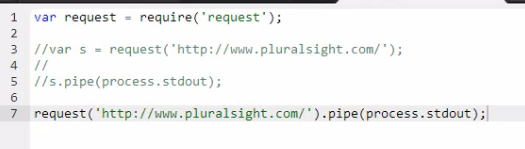


pipe
EventEmitter
https://app.pluralsight.com/player?course=node-intro&author=paul-ofallon&name=node-intro-m3-streams&clip=1

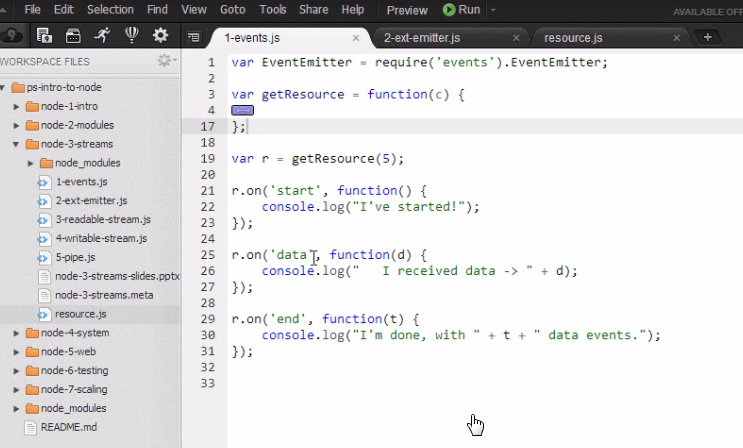
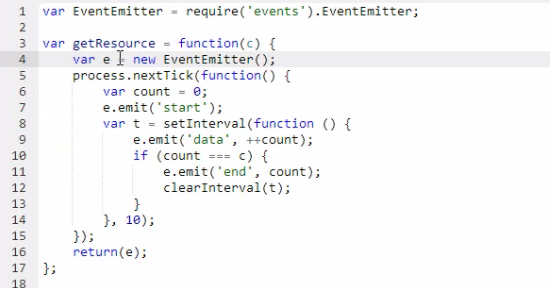
use inherit


Wednesday, July 13, 2016
box in a box with dynamic content
- The container must have display:table
- The boxes inside container must be: display:table-cell
- Don't put floats.
flex-container
<!DOCTYPE HTML>
<html>
<head>
<meta charset="utf-8">
<title>Untitled Document</title>
<style>
body {
margin: 0;
}
.flex-container {
display: flex;
flex-direction: column;
min-height: 40vh;
}
header {
background-color: #3F51B5;
color: #fff;
}
section.content {
flex: 1;
}
footer {
background-color: #FFC107;
color: #333;
}
</style>
</head>
<body>
<div class="flex-container">
<header>
<h1>
Header
</h1>
</header>
<section class="content">
Content
</section>
<footer>
<h4>
Footer
</h4>
</footer>
</div>
</body>
</html>
Tuesday, July 12, 2016
Count object length
http://stackoverflow.com/questions/1345939/how-do-i-count-a-javascript-objects-attributes
Count object length
Count object length
Object.keys(myObject).lengthMonday, July 11, 2016
margin background
margin background inherited from parent
so use border to show color
so use border to show color
.widget-cfaesProfile .first {
  width: 100%;
  height: 1950px;
  background: white;
  position: relative;
  border-color: white;
  border-width : 20px;
  border-style: solid;

}
Friday, July 8, 2016
Uniquely Positioning Elements
http://learn.shayhowe.com/html-css/positioning-content/
Uniquely Positioning Elements
Every now and then we’ll want to precisely position an element, but floats or inline-block elements won’t do the trick. Floats, which remove an element from the flow of a page, often produce unwanted results as surrounding elements flow around the floated element. Inline-block elements, unless we’re creating columns, can be fairly awkward to get into the proper position. For these situations we can use the
position property in connection with box offset properties.
The
position property identifies how an element is positioned on a page and whether or not it will appear within the normal flow of a document. This is used in conjunction with the box offset properties—top, right, bottom, and left—which identify exactlywhere an element will be positioned by moving elements in a number of different directions.
By default every element has a
position value of static, which means that it exists in the normal flow of a document and it doesn’t accept any box offset properties. Thestatic value is most commonly overwritten with a relative or absolute value, which we’ll examine next.Relative Positioning
The
relative value for the position property allows elements to appear within the normal flow a page, leaving space for an element as intended while not allowing other elements to flow around it; however, it also allows an element’s display position to be modified with the box offset properties. For example, consider the following HTML and CSS:HTML
1 2 3 4 | <div>...</div> <div class="offset">...</div> <div>...</div> |
CSS
1 2 3 4 5 6 7 8 9 10 | div { height: 100px; width: 100px; } .offset { left: 20px; position: relative; top: 20px; } |
Relative Positioning Demo
Here the second
<div> element, the element with the class of offset, has a positionvalue of relative and two box offset properties, left and top. This preserves the original position of the element, and other elements are not allowed to move into this space. Additionally, the box offset properties reposition the element, pushing it 20pixels from the left and 20 pixels from the top of its original location.
With relatively positioned elements, it’s important to know that the box offset properties identify where an element will be moved from given its original position. Thus, the
left property with a value of 20 pixels will actually push the element towards the right, from the left, 20 pixels. The top property with a value of 20 pixels, then, will push an element towards the bottom, from the top, 20 pixels.
When we position the element using the box offset properties, the element overlaps the element below it rather than moving that element down as the
margin or paddingproperties would.Absolute Positioning
The
absolute value for the position property is different from the relative value in that an element with a position value of absolute will not appear within the normal flow of a document, and the original space and position of the absolutely positioned element will not be preserved.
Additionally, absolutely positioned elements are moved in relation to their closest relatively positioned parent element. Should a relatively positioned parent element not exist, the absolutely positioned element will be positioned in relation to the
<body>element. That’s quite a bit of information; let’s take a look at how this works inside some code:HTML
1 2 3 4 | <section> <div class="offset">...</div> </section> |
CSS
1 2 3 4 5 6 7 8 9 | section { position: relative; } div { position: absolute; right: 20px; top: 20px; } |
Absolute Positioning Demo
In this example the
<section> element is relatively positioned but doesn’t include any box offset properties. Consequently its position doesn’t change. The <div> element with a class of offset includes a position value of absolute. Because the<section> element is the closest relatively positioned parent element to the <div>element, the <div> element will be positioned in relation to the <section> element.
With relatively positioned elements, the box offset properties identify in which direction an element would be moved in relation to itself. With absolutely positioned elements, the box offset properties identify in which direction an element will be moved in relation to its closest relatively positioned parent element.
As a result of the
right and top box offset properties, the <div> element will appear20 pixels from the right and 20 pixels from the top of the <section>.
Because the
<div> element is absolutely positioned, it does not sit within the normal flow of the page and will overlap any surrounding elements. Additionally, the original position of the <div> is not preserved, and other elements are able to occupy that space.
Typically, most positioning can be handled without the use of the
position property and box offset properties, but in certain cases they can be extremely helpful.Positioning with Inline-Block
http://learn.shayhowe.com/html-css/positioning-content/
Another way to remove the white space between inline-block elements is to open an HTML comment directly after an inline-block element’s closing tag. Then, close the HTML com- ment immediately before the next inline-block element’s opening tag. Doing this allows inline-block elements to begin and end on separate lines of HTML and “comments out” any potential spaces between the elements. The resulting code would look like this:
Positioning with Inline-Block
In addition to using floats, another way we can position content is by using the
display property in conjunction with the inline-block value. The inline-block method, as we’ll discuss, is primarily helpful for laying out pages or for placing elements next to one another within a line.
Recall that the
inline-block value for the display property will display elements within a line while allowing them to accept all box model properties, including height,width, padding, border, and margin. Using inline-block elements allows us to take full advantage of the box model without having to worry about clearing any floats.Inline-Block in Practice
Let’s take a look at our three-column example from before. We’ll start by keeping our HTML just as it is:
1 2 3 4 5 6 | <header>...</header> <section>...</section> <section>...</section> <section>...</section> <footer>...</footer> |
Now instead of floating our three
<section> elements, we’ll change their displayvalues to inline-block, leaving the margin and width properties from before alone. Our resulting CSS will look like this:1 2 3 4 5 6 | section { display: inline-block; margin: 0 1.5%; width: 30%; } |
Unfortunately, this code alone doesn’t quite do the trick, and the last
<section>element is pushed to a new row. Remember, because inline-block elements are displayed on the same line as one another, they include a single space between them. When the size of each single space is added to the width and horizontal margin values of all the elements in the row, the total width becomes too great, pushing the last<section> element to a new row. In order to display all of the <section> elements on the same row, the white space between each <section> element must be removed.Inline-Block Elements with White Space Demo
Removing Spaces Between Inline-Block Elements
There are a number of ways to remove the space between inline-block elements, and some are more complex than others. We are going to focus on two of the easiest ways, both of which happen inside HTML.
The first solution is to put each new
<section> element’s opening tag on the same line as the previous <section> element’s closing tag. Rather than using a new line for each element, we’ll end and begin elements on the same line. Our HTML could look like this:1 2 3 4 5 6 7 8 9 10 | <header>...</header> <section> ... </section><section> ... </section><section> ... </section> <footer>...</footer> |
Writing inline-block elements this way ensures that the space between inline-block elements within HTML doesn’t exist; consequently, the space will not appear when the page is rendered.
Inline-Block Elements without White Space Demo
Another way to remove the white space between inline-block elements is to open an HTML comment directly after an inline-block element’s closing tag. Then, close the HTML com- ment immediately before the next inline-block element’s opening tag. Doing this allows inline-block elements to begin and end on separate lines of HTML and “comments out” any potential spaces between the elements. The resulting code would look like this:
1 2 3 4 5 6 7 8 9 10 11 12 | <header>...</header> <section> ... </section><!-- --><section> ... </section><!-- --><section> ... </section> <footer>...</footer> |
Neither of these options is perfect, but they are helpful. I tend to favor using comments for better organization, but which option you choose is entirely up to you.
Subscribe to:
Posts (Atom)